Cultural and Historical Introduction
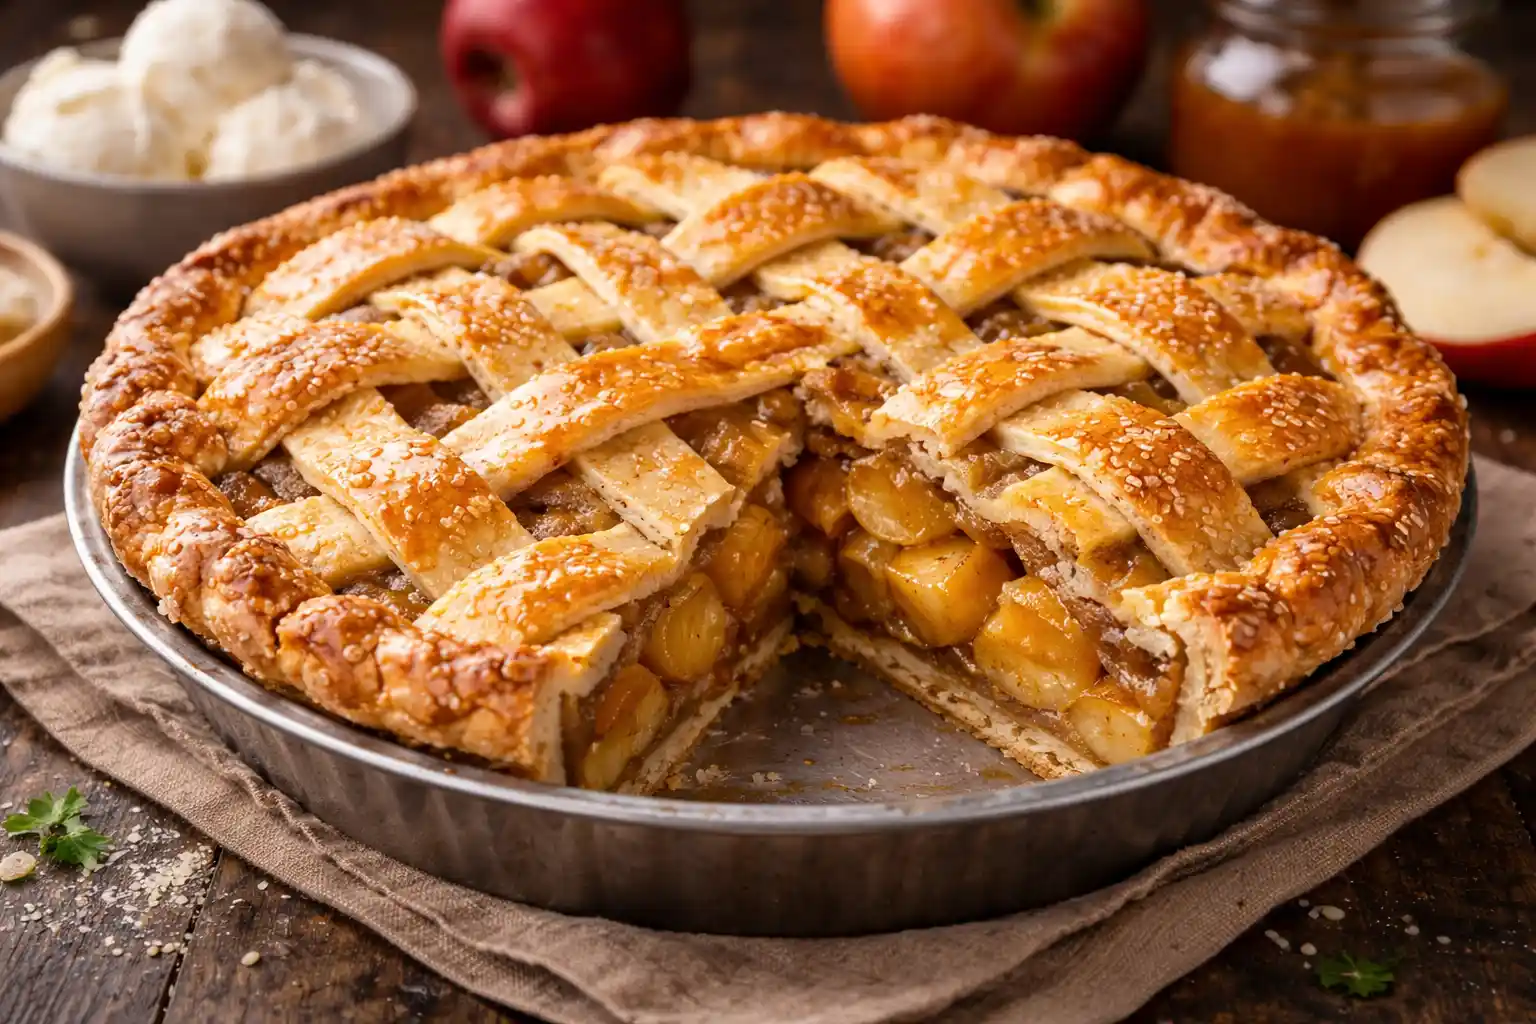
If you want to summarize American identity in just one dish—one dish that carries within it the smell of wooden houses in New England, the sound of children’s laughter around the Thanksgiving table, the longing of early immigrants for their old homelands, and their dream of a new homeland—that dish will not be hamburger or hot dog or even roasted turkey. It will be a golden triangular slice of American apple pie, emanating the smell of cinnamon, butter, and caramelized apples, resting on a simple white plate alongside a slowly melting scoop of vanilla ice cream.
Apple Pie is not just a dessert in the United States. It is a true national symbol, present in proverbs (“As American as apple pie”), in national songs, in movies, in politicians’ speeches, and in the memory of every American family from the East Coast to the West Coast. It is the dessert that brings grandmother and granddaughter together in the kitchen on Thanksgiving morning, the dish that town ladies compete to present the best version of at local festival competitions every fall, and the dessert that soldiers far from home dream of as a symbol of everything they left behind.
But behind this great cultural symbol stands a real recipe that requires real mastery. Great apple pie is not a simple matter—it is a precise equation that starts with choosing the correct type of apple that retains its firmness after cooking and doesn’t turn into a mushy pulp, goes through making a flaky crust that dissolves under the teeth like golden flakes thanks to high-quality cold butter incorporated with a calculated technique, and ends with a balanced filling that combines the natural sweetness of apples with their slight acidity, the warmth of cinnamon and a touch of nutmeg and the depth of caramelized brown sugar.
According to Atayeb, American Apple Pie is the most famous dessert in the United States, combining the flaky crust, fresh apple flavor, and warm cinnamon aroma that reflects authentic American heritage—and it is a dish worth learning to make with your own hands because nothing compares to an apple pie that just came out of your oven on a cold autumn evening.
History of the Dish and Its Roots
The story of American apple pie begins—as many expect—outside America centuries ago. Fruit-filled pies were an established part of European cuisine since the Middle Ages, specifically in England, Holland, France, and Germany. The oldest documented recipe for apple pie dates back to 1381 in England, and it included apples and spices like saffron, ginger, figs, and raisins in a primitive dough crust. In Holland, the Dutch apple pie “Appeltaart” with its thick crust and raisin, almond, and cinnamon-rich filling was a beloved folk dish served with coffee in Amsterdam cafés since the sixteenth century.
When the first settlers arrived in the New World—from the English in Jamestown and Plymouth to the Dutch in New Amsterdam (later New York) and the Germans in Pennsylvania—they brought their pie recipes and baking skills with them. But they faced a practical problem: apples didn’t originally exist in North America. Apples are not native to the American continent—all apples in America today descend from seeds and saplings brought by settlers from Europe. It took decades for apple orchards to grow, bear fruit, and spread—and here comes one of the most beautiful folk characters in American history: Johnny Appleseed.
Johnny Appleseed—whose real name was John Chapman (1774–1845)—was a simple man who spent his life walking barefoot across the Midwestern states of America planting apple seeds wherever he went and distributing saplings to farmers and settlers. Thanks to his efforts and those of other farmers, states like Ohio, Indiana, and Illinois turned into vast apple orchards, providing the raw material for pies that would one day become a symbol for an entire nation. Johnny Appleseed himself became an American folk legend—a kind-hearted barefoot hero planting trees and feeding strangers, living in harmony with nature—and his name became forever linked with apples and apple pie.
With the abundance of apples in the nineteenth century, apple pie became a daily dish in American homes—not just as a dessert but sometimes as breakfast or dinner in rural areas where apples were the cheapest and most available fruit. American housewives began developing the recipe and adding their own personal touch: cinnamon was added as a basic spice that gives the filling its distinctive warmth, brown sugar was added for its caramel depth, and nutmeg for an elegant mysterious touch. The crust evolved from a practical hard crust to a fancy flaky butter crust “Flaky Pie Crust” that breaks into thin golden layers like butterfly wings. And variations appeared: pie with a full crust cover, pie with a braided lattice crust top that reveals the filling through it, and pie with a crispy butter crumb topping (Dutch Apple Pie or Crumb Topping) in the American Dutch style.
In the twentieth century, apple pie transformed from just a beloved dish into a national symbol. During World War II, when American soldiers were asked why they were fighting, the famous answer was: “For Mom and apple pie.” This phrase condensed in few words everything that apple pie represented in the American consciousness: home, family, traditions, security, and belonging. Since then, the pie has cemented its place as the star of the Thanksgiving table, New Year’s Day, Fourth of July, and family reunions. The recipe spread worldwide and adapted to local tastes—in Japan touches of green tea and honey were added, in France it was reimagined as an elegant apple tart, and in the Middle East it is sometimes served with cardamom and rose water—but in all its forms it retains the spirit of that warm American dish that was born in settler kitchens and grew in the hearts of millions.
Comprehensive Recipe Card
| Feature | Details |
|---|---|
| Prep Time | 30–40 minutes |
| Crust Chilling Time | At least 60 minutes |
| Baking Time | 45–55 minutes |
| Total Time | 2½ to 3 hours |
| Servings | 8–10 people |
| Category | Desserts / Pies / American Cuisine |
| Difficulty Level | Medium |
Ingredients and Measurements
First: Pie Crust (Pie Crust) — Enough for Base and Top
| Ingredient | Amount | Role / Notes |
|---|---|---|
| All-purpose flour | 350 g (2½ cups) | Structural base of the crust—should not be overworked to maintain flakiness |
| Unsalted very cold butter | 230 g (1 cup) | The secret of flakiness—should be cubed into small cubes and taken directly from the freezer |
| Granulated sugar | 15 g (1 tablespoon) | Subtle sweetness that balances crust salinity without turning it into a sweet dough |
| Fine salt | 5 g (1 teaspoon) | Enhances butter and flour flavor and prevents crust from being tasteless |
| Ice water | 80–120 ml (⅓ to ½ cup) | To bind the crust—should be very cold and added in the smallest amount possible |
Second: Filling (Apple Filling)
| Ingredient | Amount | Role / Notes |
|---|---|---|
| Fresh peeled and sliced apples | 1 kg (about 6–7 large apples) | Main ingredient—use a mix of tart and sweet for balance |
| Granulated sugar | 100 g (½ cup) | Basic sweetness |
| Light brown sugar | 50 g (¼ cup) | Adds caramel depth and warm toffee flavor to the filling |
| Ground cinnamon | 2 teaspoons | Primary spice—the flavor that defines apple pie and gives it its distinctive warmth |
| Freshly grated nutmeg | ¼ teaspoon | Warm mysterious flavor that complements cinnamon without overpowering it |
| Fresh lemon juice | 2 tablespoons | Prevents apple oxidation and adds acidity that balances sweetness and refreshes the filling |
| Cornstarch (or flour) | 2 tablespoons | Absorbs liquids secreted by apples during baking and prevents filling from being soggy |
| Cold cubed butter | 30 g (2 tablespoons) | Distributed over the filling before covering to add richness and flavor |
Third: For Brushing the Top
| Ingredient | Amount | Role / Notes |
|---|---|---|
| Large egg | 1 | Beaten with a little water and brushed on crust surface for golden glossy color |
| Turbinado sugar (optional) | 1 tablespoon | Sprinkled on top before baking to give shiny sugary crunch |
Detailed Preparation Steps
Phase One: Preparing the Crust—The Art of Flakiness
The crust is the heart and soul of apple pie, and making the perfect flaky pie crust is one of the most rewarding skills you can learn in the world of baking. The whole secret comes down to one word: coldness.
Start by placing the flour, sugar, and salt in a large bowl and mix with a spoon. Take the butter out of the freezer—yes, the freezer, not just the refrigerator—and quickly cut it into small pea-sized cubes. Toss the butter cubes into the flour and begin incorporating them using a pastry cutter or two forks or even your fingertips—but quickly so the butter doesn’t melt from your hands’ heat. The goal is to reach a mixture that resembles coarse crumbs with visible butter pieces the size of peas remaining here and there. These visible butter pieces are the real secret—in the oven they will melt and the moisture in them will evaporate, creating steam bubbles that separate the dough layers and create that flaky structure that makes pie crust magical.
Add the ice water one tablespoon at a time while stirring with a fork after each addition. Don’t add all the water at once—add only enough so the dough comes together when you press a handful in your hand. If it comes together without falling apart, you’ve added enough water. The golden rule is: less water possible means flakier dough.
Turn the dough out onto a lightly floured surface and quickly gather it into a disc without kneading, and divide it into two discs: one slightly larger for the base and another smaller for the top. Wrap each disc in plastic wrap and refrigerate for at least one hour. This rest is necessary for two reasons: it re-solidifies any butter that may have softened during handling, and it relaxes the gluten proteins in the flour so the dough becomes easier to roll out and less prone to shrinking in the oven.
Phase Two: Preparing the Filling—Symphony of Apples and Cinnamon
While the dough rests in the refrigerator, it’s time for the filling. Choosing apples is the most important decision here. Don’t use just one type—the secret is in the mix. Use a combination of tart Granny Smith apples that retain their firmness and don’t dissolve during baking, with sweeter varieties like Honeycrisp or Fuji or Gala that melt slightly and produce a natural sauce that binds the filling. This combination of firm and soft, tart and sweet is what produces a multi-layered filling in flavor and texture.
Peel the apples, remove the cores, and slice them into medium thickness—about half a centimeter. If the slices are too thin they’ll turn to puree, and if they’re too thick they won’t cook completely. Place the apple slices in a large bowl and add the granulated sugar, brown sugar, cinnamon, nutmeg, lemon juice, and cornstarch and toss until every slice is coated with the mixture. Let the filling sit aside for 15 minutes—during this time the sugar draws some juice from the apples, and you can strain some of this juice before filling the pie if you want a firmer, less runny filling.
Phase Three: Assembling the Pie—The Moment of Building
Take the larger dough disc out of the refrigerator and let it sit for five minutes to soften slightly (but don’t wait until it becomes soft). Lightly flour your work surface and begin rolling out the dough with a rolling pin from the center outward in even strokes, rotating the dough a quarter turn between each roll to keep it round and even. Roll it out until its diameter is about 5 centimeters larger than the pie pan’s diameter on each side.
Gently roll the rolled dough around the rolling pin and then unroll it over the pie pan (using a glass Pyrex or ceramic pan is preferred). Gently press the dough into the bottom and sides of the pan without stretching—stretching will make it shrink during baking. Let the excess dough hang over the edges for now.
Pour the apple filling into the lined pan and arrange the slices with your hands to fill the gaps and build a slightly raised mound in the center—the filling will sink during baking so don’t be afraid of it being high. Distribute the cold butter cubes over the filling.
Take the second dough disc out of the refrigerator and roll it out the same way. Here you have two options: either place the whole dough over the filling as a sealed top with 4 to 5 small knife slits to allow steam to escape, or cut it into long strips and weave a braided lattice over the filling—the classic and most beautiful shape that reveals the apples between the golden dough lines. In both cases, fold the top and bottom dough edges together and press with your fingers or the back of a fork to seal them.
Phase Four: Baking—The Golden Transformation
Preheat the oven to 200°C (400°F). Place a rack in the lower third of the oven—not in the middle—because heat from the bottom is essential for baking the crust completely and preventing it from being raw and moist (the most common problem with apple pies).
Beat the egg with a teaspoon of water and brush the dough surface with this mixture using a soft brush—this is what will give the pie its delicious golden glossy shine. Sprinkle the turbinado sugar on top if you want a shiny sugary crunch on the surface.
Put the pie in the oven and bake at 200°C for 20 minutes—this high initial temperature sets the crust and begins the flaking process. Then reduce the heat to 180°C (350°F) and continue baking for an additional 30 to 35 minutes or until the crust becomes deep golden and you see apple juice bubbles boiling from the slits or lattice openings. If you notice the crust edges are browning too much before baking is complete, cover them with strips of aluminum foil.
Phase Five: Cooling and Serving—The Final Patience
This phase is the hardest psychologically—because the smell of the pie as it comes out of the oven will make you want to cut it immediately. But resist this temptation. Let the pie cool on a wire rack for at least one hour—preferably two. During this time, the cornstarch absorbs the juice and thickens the filling, the apple slices set, and the crust finishes setting. If you cut the pie while hot the slice will collapse and the filling will run everywhere—if you wait you’ll get a perfect triangular slice with a set filling and clearly layered crust.
Serve the pie warm or at room temperature. The classic addition is a scoop of vanilla ice cream that slowly melts on the warm slice—this is called “Apple Pie à la Mode.” It can also be served with salted caramel sauce, whipped cream, or a slice of sharp cheddar cheese—a traditional addition in New England states that may seem strange but is amazingly delicious where the cheese’s saltiness harmonizes with the apples’ sweetness.
Success Secrets and Scientific Tips
Cold butter is the first and last secret for flaky crust. If you feel the butter starting to soften during dough preparation, put everything back in the freezer for ten minutes and continue. Some professional chefs even freeze the flour and bowl to ensure a completely cold environment.
Not over-kneading the dough is the second golden rule. The perfect dough should look slightly incomplete—crumbly with visible butter lines. This “incompleteness” is exactly what produces flakiness and layers.
Cutting apples into uniform thickness ensures even cooking—half centimeter slices is the perfect measurement. Uneven slices mean some will cook more than necessary and some will remain firm.
Brushing the top with beaten egg before baking is what makes the difference between a pie that looks ordinary homemade and one that looks like it came from a professional bakery. The protein in the egg coagulates and gives shine, and the turbinado sugar on top adds golden sparkle.
Baking the pie in the lower third of the oven solves the “raw crust” problem that frustrates many bakers. Direct heat from the bottom cooks and crisps the crust before it gets saturated with filling juice.
Frequently Asked Questions About the Recipe
Can different types of apples be used?
Absolutely, and this is actually preferred. The best result comes from mixing two or three types: Granny Smith for acidity and firmness, Honeycrisp or Braeburn for sweetness and juiciness, and Golden Delicious for smoothness. Avoid regular Red Delicious as it loses all texture when cooking and doesn’t have enough flavor.
Can a vegan version be made?
Yes. Replace butter with high-quality cold vegan butter (like Miyoko’s or Earth Balance) making sure it is solid and completely cold. For brushing the top, replace egg with plant milk mixed with a little maple syrup. The filling is already vegan so no adjustment is needed except removing the butter distributed over it or replacing it with coconut oil.
Can the pie be frozen?
Yes, in two ways. First method: freeze the unbaked pie (assembled but not baked) then bake it directly from the freezer with an additional 15 to 20 minutes to baking time. Second method: bake the pie, let it cool completely, then freeze it, and reheat it in a 170°C oven for 20 to 25 minutes. The first method gives a result closer to fresh.
Approximate Nutritional Value
| Nutrient | Value per Serving (One Slice — ⅛ Pie) | Additional Notes |
|---|---|---|
| Calories | 350–420 calories | Depends on butter and sugar amount and slice size |
| Protein | 3–5 grams | From flour and egg used for brushing |
| Fat | 18–22 grams | Mainly from butter in the crust |
| Carbohydrates | 45–55 grams | From flour, sugars, and apples |
| Fiber | 2–3 grams | From apples especially if some peel is left |
Apple pie is energy-rich and suitable as a dessert at occasions and family gatherings. To reduce calories you can reduce sugar amount in the filling and rely more on apples’ natural sweetness, or use crust for base only without top crust and replace it with crispy oat crumble.
Motivational Conclusion
American Apple Pie is not just a recipe you follow step by step—it is a complete sensory experience that starts from the moment you peel the apples and their fresh smell fills the kitchen, goes through the tactile pleasure of rolling and shaping the dough with your own hands, rises with the smell of cinnamon, butter, and caramelized sugar that fills the whole house during baking, and reaches its peak in that moment when you cut the first golden triangular slice and put it on the plate and hear the light crunch as you fork into the flaky crust to reach the warm filling seasoned with cinnamon and caramelized apples.
This is the dessert that crossed oceans from old European kitchens to apple orchards of the New World, that transformed from simple farmer fare into a national symbol embodying warmth, family, and traditions, and that still after hundreds of years brings generations together around one table in a moment of shared joy. Every slice tells a story—a story of a grandmother teaching her granddaughter the secret of flaky crust, a story of a golden autumn in an apple orchard, a story of a family gathered around the Thanksgiving table thanking God for blessings.
Try preparing American Apple Pie according to Atayeb’s steps to enjoy a flaky crust, cinnamon-rich apple filling, and a classic dessert that combines heritage and wonderful taste on your table. Preheat the oven, choose the finest apples from the market, and prepare to make a new memory in your kitchen! 🥧