Cultural and Historical Introduction
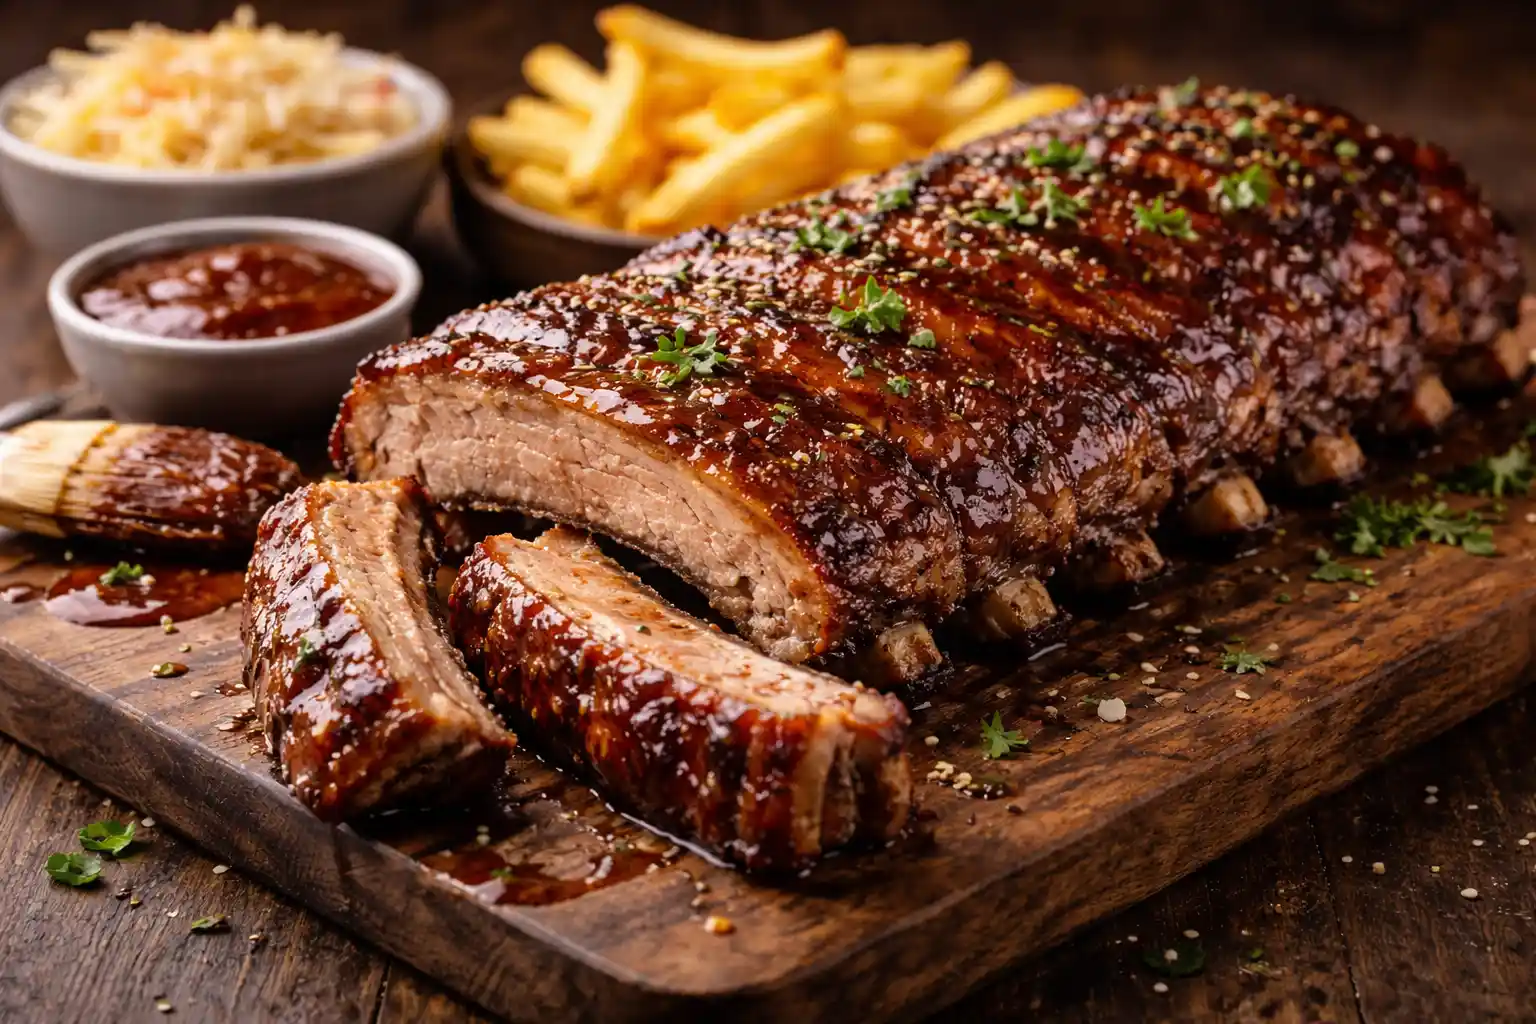
Somewhere in Texas or Tennessee or the Carolinas, in a backyard shaded by ancient oak trees, a man stands before a massive black iron smoker from which a thick column of fragrant white smoke rises—smoke perfumed with hickory or mesquite wood. On the smoker’s racks rest enormous ribs carefully arranged, glistening with a dark coating of smoked spices and caramelized brown sugar, slowly ripening—hour after hour—in a warm bath of smoke and low heat until the meat becomes so tender it falls from the bone at the mere touch of a fork. This is not cooking—this is an American ritual par excellence, a ritual that blends patience, science, art, and traditions passed down through generations.
BBQ Ribs are not merely a dish in the United States. They are an entire cultural institution with their own festivals, national competitions, world championships, competing teams, professional judges, and substantial prize money. Every summer, America’s backyards and public parks fill with barbecue smoke in what resembles an open national celebration—from Independence Day on July Fourth through Labor Day in September and every weekend in between. Families gather, neighbors exchange dishes, children play in the yard while everyone waits for that magical moment when the ribs emerge from the smoker or grill coated in a dark glossy crust that barbecue enthusiasts call the “Bark”—that crispy outer layer made of spices, smoke, and caramelized sugar that hides beneath it tender pink meat that melts in the mouth.
According to Atayeb, American-style grilled ribs (BBQ Ribs) are a famous dish that combines tender texture, smoked flavor, and rich barbecue sauces that add an authentic American character to your table—a dish that deserves every minute of the slow cooking hours it requires.
What makes this dish exceptional is that it requires something rare in today’s accelerated modern cooking world: patience. In an era where everything is instant, canned, and microwaved within minutes, barbecue ribs stand as a reminder that the greatest flavors need time, and slow cooking is not a delay but an investment in pleasure. Three to four hours of low-heat cooking does to ribs what no quick method can do—it transforms the tough collagen in the meat into dissolved gelatin, giving it that unforgettable silky texture.
History of the Dish and Its Roots
The story of American barbecue ribs begins with a painful historical paradox: this dish that became the pride of American cuisine was born in the darkest chapter of American history—the era of slavery. The word “Barbecue” itself is likely derived from “Barbacoa,” a word from the Taíno people’s language in the Caribbean region, and referred to a cooking technique for slowly roasting meat over low wood fire on an elevated wooden frame. When Spanish and British colonizers arrived in the New World, they learned this technique from the indigenous people and brought it to the Southern colonies.
But it was African slaves forcibly brought to Southern American plantations who transformed this simple technique into true art. On large plantations, slave owners kept the best cuts of meat—steaks and fancy roasts—for themselves and left slaves the cuts they considered inferior: ribs, shoulders, extremities, and organ meats. But the African slaves brought with them deep knowledge of smoking, seasoning, and slow cooking techniques from their West African traditions, and they applied this knowledge to those “humble” cuts and transformed them into incredibly flavorful dishes. They learned that slow cooking over low heat for many hours transforms tough, cheap meat into meat so tender it melts in the mouth, that smoke adds a deep, complex flavor that rivals the most expensive spices, and that mixing spices, sugar, and vinegar produces sauces that complement meat and elevate it to an entirely different level.
After the Civil War and the emancipation of slaves in the 1860s, freed African Americans carried their barbecue traditions wherever they went. Many opened small restaurants and roadside barbecue joints throughout the South, and these establishments became important community institutions—places for gathering, connection, and celebration. Over the decades, distinct regional schools of barbecue developed, each proud of its own style and considering it the best.
In Memphis, Tennessee, ribs became the primary star. Memphis is the undisputed “Capital of Barbecue Ribs,” and it has two famous styles: “Dry Ribs” covered with a thick layer of dry spices without sauce, and “Wet Ribs” coated with layers of sweet, sticky barbecue sauce. In Kansas City, Missouri, a style developed that focuses on a thick, sweet sauce made of tomatoes, molasses, and brown sugar that coats the meat in a glossy, sticky layer. In Texas, the style tends toward simplicity—salt and pepper only with long smoking over oak wood—and they prefer large beef ribs over pork ribs. And in the Carolinas, vinegar-based or mustard-based sauces are used instead of tomatoes, giving a distinctive acidic flavor that cuts through the richness of the meat.
In the second half of the twentieth century, barbecue ribs moved from being working-class food in the South to a beloved dish throughout America and the world. This was helped by the spread of barbecue restaurant chains, cooking television programs, and live-broadcast barbecue competitions that attract millions of viewers. Today, American barbecue ribs are found in restaurants in Tokyo, Sydney, London, Dubai, and every major city in the world—but they remain at their heart a Southern American dish invented by people who turned necessity into art and made one of history’s greatest dishes from the simplest ingredients.
Comprehensive Recipe Card
| Feature | Details |
|---|---|
| Prep Time | 20–30 minutes |
| Marinating Time | 4 hours to one full night (12 hours) |
| Cooking Time | 3–4 hours |
| Total Time | 7–16 hours (including marinating) |
| Servings | 4–6 people |
| Category | Main Dishes / Grilled / American Cuisine |
| Difficulty Level | Intermediate–Advanced |
Ingredients and Measurements
First: Ribs and Dry Spices (Dry Rub)
| Ingredient | Amount | Role / Notes |
|---|---|---|
| Beef or lamb ribs (full rack) | 2 racks (approximately 2–2.5 kg) | Main ingredient—choose ribs with a thick layer of meat and good fat distribution |
| Smoked paprika | 3 tablespoons | Primary spice—gives dark red color and distinctive smoked flavor |
| Brown sugar | 2 tablespoons | Caramelizes on the surface and produces the dark glossy crust |
| Coarse salt | 1½ tablespoons | Enhances meat flavor and helps form crust |
| Freshly ground black pepper | 1 tablespoon | Subtle heat and depth of flavor |
| Garlic powder | 1 tablespoon | Concentrated garlic flavor that penetrates the meat |
| Onion powder | 1 tablespoon | Complements garlic and adds subtle sweetness |
| Ground cumin | 1 teaspoon | Warm earthy flavor that deepens spice dimensions |
| Cayenne pepper (optional) | ½ teaspoon | Extra heat touch for those who like spicy |
| Dry mustard | 1 teaspoon | Subtle acidity that balances sweetness and smoke |
Second: Homemade Barbecue Sauce
| Ingredient | Amount | Role / Notes |
|---|---|---|
| Ketchup | 1 cup (240 ml) | Tomato base for the sauce |
| Brown sugar | 60 g (¼ cup) | Deep sweetness with molasses and caramel notes |
| Apple cider vinegar | 60 ml (¼ cup) | Acidity that cuts sweetness and refreshes the sauce |
| Worcestershire sauce | 2 tablespoons | Complex umami flavor and savory depth |
| Smoked paprika | 1 teaspoon | Enhances the smoked character of the sauce |
| Garlic powder | 1 teaspoon | Complementary garlic flavor |
| Onion powder | ½ teaspoon | Subtle sweetness |
| Yellow mustard (prepared) | 1 tablespoon | Acidity and distinctive flavor |
| Blackstrap molasses or honey | 2 tablespoons | Depth, viscosity, and richness of taste |
| Salt and pepper | To taste | For adjusting final flavor |
Third: For Cooking
| Ingredient | Amount | Role / Notes |
|---|---|---|
| Water or beef broth | 1 cup (240 ml) | Placed at the bottom of the pan to maintain meat moisture during slow cooking |
| Apple cider vinegar | 60 ml (¼ cup) | Added to water for an acidic environment that helps tenderize the meat |
| Vegetable oil | 2 tablespoons | For greasing the grate if using a grill |
Detailed Preparation Steps
Phase One: Preparing the Ribs—Removing the Membrane and Preparing the Surface
The first and most important step that many overlook, and which makes a huge difference: removing the silver membrane (Membrane) from the inside of the ribs. This thin, shiny membrane covers the bone side of the ribs, and if left on, it will prevent spices from penetrating the meat from this side and it will remain tough and chewy after cooking. To remove it, insert the tip of a dull knife or the handle of a spoon under the membrane’s edge at one end of the rack, and lift it enough to grip it with your fingers—use a paper towel because the membrane is slippery—then pull it in a steady motion. It may come off in one piece or require several attempts. Once removed, you’ll notice the meat underneath is white and exposed, ready to absorb the spices.
Dry the ribs completely with paper towels on both sides. A dry surface allows the spices to adhere better and helps form the desired crust during cooking. Some chefs rub a thin layer of yellow mustard on the meat surface before applying the spices—the mustard won’t affect the final taste (its flavor disappears during cooking) but it works as an excellent adhesive that fixes the spices to the meat.
Phase Two: Dry Spices (Dry Rub)—The Magic Layer
In a small bowl, mix all the dry spice ingredients: smoked paprika, brown sugar, salt, black pepper, garlic powder, onion powder, cumin, cayenne, and dry mustard. This mixture is the “Rub”—and it’s the most important element in barbecue after the meat itself. Every professional barbecue chef has a secret “rub” blend that they guard with their life and adjust over years until reaching the perfect balance between salt, sweetness, acidity, heat, and smoke.
Generously sprinkle the spice mixture on all surfaces of the ribs—the meat side, the bone side, and the edges—and rub the spices into the meat with your fingertips in gentle circular motions. The meat surface should be completely covered with a thick visible layer of spices. Don’t hold back—the amount that seems excessive on raw meat will be perfect after hours of cooking because much of the flavor penetrates into the meat and some evaporates.
Phase Three: Marinating and Resting—The First Patience
Wrap the seasoned ribs tightly in plastic wrap or place them in a large sealed plastic bag and refrigerate them. The minimum is 4 hours, but the ideal option is to season them in the evening and leave them overnight—8 to 12 hours. During this time, salt draws moisture from the meat’s surface then reabsorbs it with the dissolved spices in a process called “Dry Brining,” seasoning the meat to the depth, not just the surface. The brown sugar begins to penetrate and the subtle acids in the spices begin to tenderize the surface fibers.
Remove the ribs from the refrigerator 30 to 45 minutes before cooking to return to room temperature. Cooking meat that’s too cold means the outside will cook before the inside by a significant margin.
Phase Four: Slow Cooking—The Heart of the Process
Preheat the oven to 135°C (275°F). This low temperature is the key to everything—heat enough to cook the meat slowly but low enough to prevent it from drying and allows the collagen to gradually transform into gelatin. This chemical transformation—from tough collagen to silky gelatin—is what gives barbecue ribs their legendary texture that melts in the mouth, and it only happens at low temperature and over a long time.
Place the ribs in a large baking pan—meat side up—and pour the cup of water or broth with apple cider vinegar at the bottom of the pan. This liquid will slowly evaporate during cooking and maintain a humid environment inside the oven that prevents the meat from drying. Cover the pan tightly with two layers of aluminum foil—tightness is important because we want to trap steam inside.
Put the pan in the oven and leave it for 2.5 to 3 hours without opening the lid. Resisting the temptation to open the foil and check the meat every half hour is one of the hardest things but it’s necessary—every time you open the lid you lose heat and precious steam and extend cooking time.
After 2.5 hours, carefully open the foil (the steam is very hot) and examine the meat. The meat is ready for the next phase when you notice that the meat has shrunk and pulled back from the ends of the bones by about one centimeter, and when you insert a fork into the thickest part and notice it enters easily with slight resistance. If the meat is still tough, re-cover and return it to the oven for an additional half hour.
Phase Five: Barbecue Sauce—The Crowning
While the ribs are in the oven, prepare the homemade barbecue sauce. In a medium pot over medium heat, mix the ketchup, brown sugar, apple cider vinegar, Worcestershire sauce, smoked paprika, garlic powder, onion powder, mustard, and blackstrap molasses. Stir until the sugar dissolves and the mixture is combined, then reduce heat and let the sauce simmer over low heat for 15 to 20 minutes until it thickens slightly and the flavor deepens. Taste and adjust salt and pepper. If you want it sweeter, add honey; if you want it more acidic, add vinegar; if you want it hotter, add cayenne. Homemade barbecue sauce surpasses any store-bought sauce because you control every element in it and adjust it to your taste.
When the ribs become tender enough, lift the foil and brush the meat surface with a generous layer of barbecue sauce using a silicone brush. Raise the oven temperature to 200°C and return the uncovered ribs (without foil) for 15 to 20 minutes. This final phase does two important things: caramelizes the sugar in the sauce and produces that distinctive dark glossy sticky layer, and dries the surface slightly to form the crispy “Bark” crust that characterizes real barbecue.
Remove the ribs and brush them with a second layer of sauce immediately—the heat will melt the fresh sauce and merge it with the first layer in a delicious glossy coating.
Phase Six: Resting and Serving
Let the ribs rest for 10 to 15 minutes before cutting. This rest allows the meat juices that have been pushed outward by the heat to be redistributed throughout the piece of meat, so every bite is full of juices instead of all the juices running onto the cutting board.
Cut the ribs between the bones with a sharp knife—if the meat has been cooked correctly, the knife will glide through like butter. Serve the ribs hot on a large platter with a bowl of extra barbecue sauce on the side. Classic side dishes are coleslaw (shredded cabbage with mayonnaise and vinegar) which provides a refreshing acidity that cuts through the richness of the meat, sweet cornbread that wipes up the sauce, mashed or fried potatoes, and baked beans with brown sugar and molasses.
Success Secrets and Scientific Tips
Using smoked paprika and brown sugar together produces what is called the “Maillard Reaction”—the chemical reaction between proteins and sugars when exposed to heat that produces hundreds of aromatic compounds responsible for that complex smoky caramel taste unmatched by anything else. Brown sugar specifically is better than white because the molasses in it adds an extra layer of flavor and helps form a darker, deeper crust.
Slow cooking over low heat is the first and last scientific secret to tenderness. Collagen—the tough structural protein found abundantly in ribs—begins to break down and transform into gelatin at about 70°C internal temperature, but this transformation needs time. High heat dries out the meat before collagen finishes its transformation, while low heat gives enough time for this magical transformation.
Applying sauce only in the final stages is a golden rule in barbecue. Barbecue sauce is full of sugar, and sugar burns quickly at high temperatures and turns into a bitter black layer. If you apply sauce at the beginning it will burn during the long cooking hours. The solution is to add it only in the last 15 to 20 minutes—time enough for caramelization but not for burning.
Letting the ribs rest after cooking for a few minutes redistributes the internal juices and prevents their loss when cutting. This tip applies to all grilled and oven-cooked meat cuts.
Frequently Asked Questions About the Recipe
Can different types of meat be used?
Absolutely. The recipe works excellently with beef ribs (Beef Ribs) which are larger, richer in flavor, and need longer cooking time (4 to 5 hours), and with lamb ribs (Lamb Ribs) which are smaller, more tender, and need less time (2 to 2.5 hours). You can also adjust the spices according to the type of meat—lamb works well with cumin, coriander, and rosemary, while beef shines with simplicity (just salt, pepper, and paprika).
Can the barbecue sauce be prepared at home instead of using store-bought?
Yes, and this is always the best option. The homemade sauce mentioned in the recipe is simple and quick (15 minutes) and surpasses any canned sauce in flavor and freshness. You can customize it to your taste and prepare a large batch to store in the refrigerator for two weeks or in the freezer for three months.
Can it be cooked on a grill instead of in the oven?
Yes, and this is the original traditional method. Use “Indirect Grilling” style—place the charcoal on only one side of the grill and the meat on the other side, so the meat is not directly over the fire. Close the grill cover and maintain a temperature between 120 to 140°C. Add soaked wood chips (hickory, mesquite, or apple) to get the authentic smoke flavor that the oven cannot provide.
Approximate Nutritional Value
| Nutrient | Value per Serving (3–4 ribs) | Additional Notes |
|---|---|---|
| Calories | 450–600 calories | Depends on meat type, amount of sauce, and fat ratio |
| Protein | 30–40 grams | From meat—an excellent source of complete animal protein |
| Fat | 25–35 grams | From natural fats in meat—decreases if visible fat is removed |
| Carbohydrates | 15–25 grams | Mainly from sugar in sauce and spice mixture |
| Fiber | 0.5–1 gram | Very little—comes mainly from side dishes |
Grilled ribs are a dish rich in protein, fat, and energy and suitable as a main course at occasions and gatherings. To reduce calories, you can remove visible fat before cooking, use less sugar in the sauce, and serve it with light salads instead of fried potatoes.
Motivational Conclusion
American-style grilled ribs are not just a meal you eat—they are an experience you live from beginning to end. It begins from the moment you rub the spices into the meat and the smell of smoked paprika fills the kitchen, extends through the long hours of waiting during which the smell of smoked meat fills every corner of the house and makes everyone count down the minutes, and reaches its climax in that moment when you open the oven and remove the shiny dark ribs with their caramelized crust and cut them to discover that the tender pink meat falls from the bone at a mere touch—and you know that every minute of waiting was worth it.
This is the dish that was born under difficult circumstances at the hands of people who made much from little, and over two centuries transformed into one of the world’s most famous and unifying dishes around one table. Every grilled rib tells a story of inherited traditions, gentle fire, long patience, and a reward worth the wait.
Try preparing American-style grilled ribs according to Atayeb’s steps to enjoy a dish rich in flavor, tender and full of smoked sauces—an authentic American experience on your table that brings family and friends together in unforgettable moments. Heat the oven, prepare the spices, and begin your slow cooking journey—the real pleasure begins in the kitchen! 🍖🔥